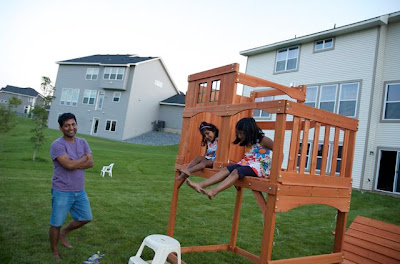
We bought a Montpelier playset for our daughters' full and half birthday present this summer.
When I was looking to buy this playset, I didn't find many good constructive reviews, all those that I saw were at either extreme so decided to share my experience in case somebody else is looking for a feedback.
It is a good playset and its not meant for commercial (daycare type) use. It is a very good deal compared to many others more expensive ones but you get what you pay for so don't expect to go full swing after you install it cause it is meant for kids, reasonably sized. I said that because when four of the rowdy boys from the neighborhood climb on the surf board which is meant for one kid or perhaps two small kids, I do wonder about their safety and that of the playset as well. Or when the oversized visitor boy banged on the fort door, the door creek found an echo in my throat.
I often wonder if we should put up a sign saying that we are not responsible for the damage that you might do to yourself while playing rough on this playset.
Anyways, so besides the fact that it is ideal for our girls and their friends and not the rowdy neighborhood kids, everything is good. And I did sneak in the fort a couple of times this summer to read a book while the kids played in the yard.
 |
| sorted pieces |
It took us (me and DH) about one week to assemble. We worked two to three hours each day, after our regular work day, initially in the garage and then outside putting it all together. The total time includes the time it took us to move the pieces and gears from the garage and back.
We started out by sorting the pieces for individual structures and their corresponding fasteners. The pieces came out well labeled and smelled wonderfully cedar. It was my job to gather and orient the pieces so that DH can use the electric drill and mallet to attach them into a reasonable shape. He did not tighten everything to the extreme so that there is wiggle room during the final assembly. We first assembled the attachments to the center supporting fort, like the ladder and the swing bar and roof and the door.
 |
| Ladder to the fort |
 |
| swing bar |
The last assembly inside the garage was the base structure which we made big enough that the two of us can still move to the backyard and yet maintain its structural stability. We put some of the floor down to make sure the fasteners don’t shear off while our downhill crawls with the bulky structure out to the backyard.
 |
| Door and the roof |
The slide assembly was the last major piece to be built and it too lacked better instructions. To not redo our work (drilling holes in plastic) we ended up cutting the plastic corners that are anyways hidden under the slide support so it wasn’t too crucial.
All in all, it was a fun experience to put it all together, like playing with life size LEGO pieces and the challenge for the girls was to beat us in the fun that we had putting it together. I think it will take them a couple of years to come up to par, we had way too much fun :-)


Enjoy
ReplyDeleteSwing Set San Diego